This guide lists the steps to configure and enable OneLogin SSO for your organization.

Configuring the RudderStack SSO app
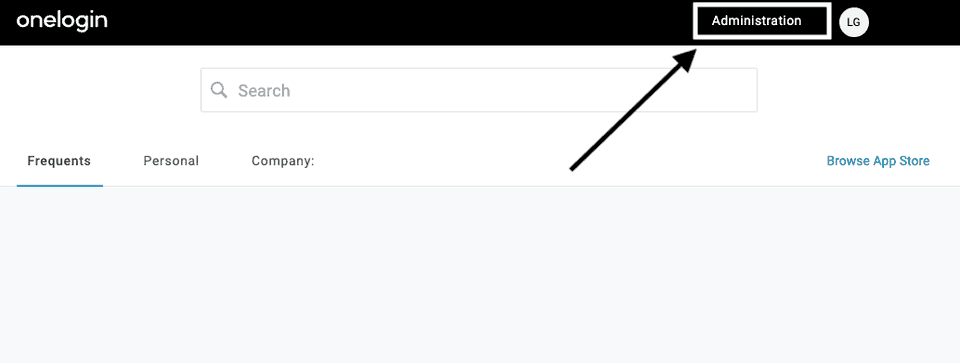
- Log into your OneLogin portal and click Administration in the top menu, as shown:
- From the top menu, go to Applications > Applications, as shown:

- Then, click Add App, as shown:

- In the resulting Find Applications page, search for SAML Custom Connector (Advanced). From the search results, select the application, as shown:

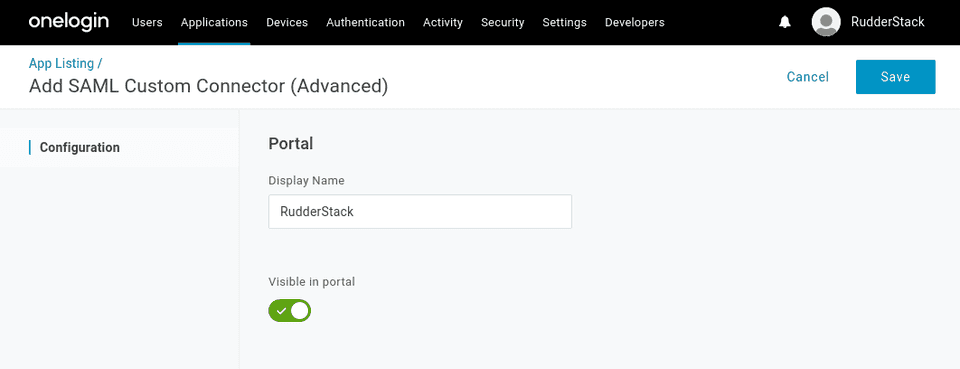
- Name your SAML app and click Save, as shown:
- In the Configuration tab, enter the settings as shown in the following image:
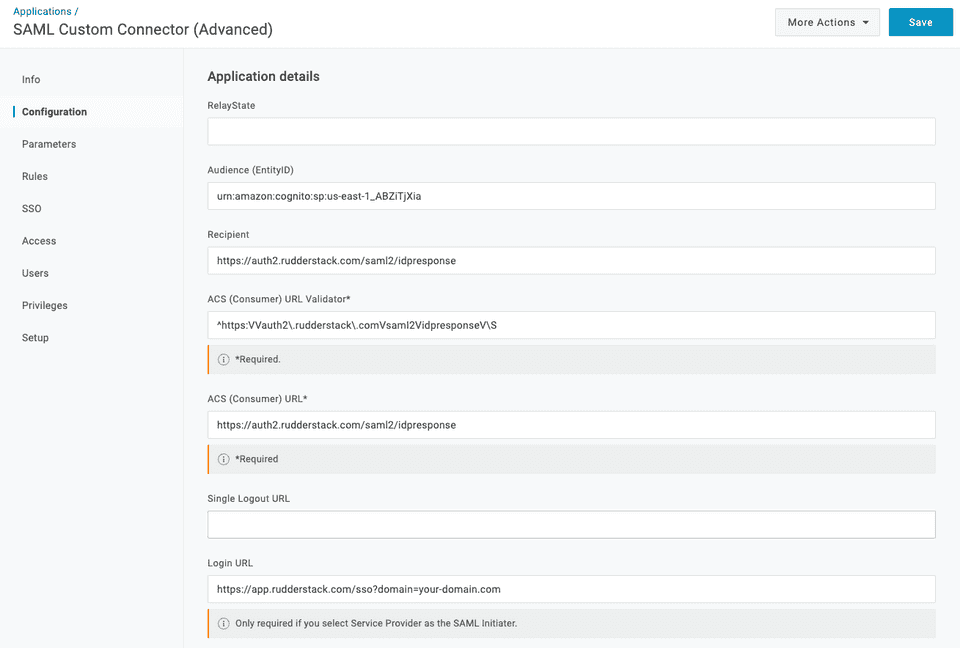
The settings to be configured are listed in the following table:
| Setting | Value |
|---|---|
| Audience (EntityID) | urn:amazon:cognito:sp:us-east-1_ABZiTjXia |
| Recipient | https://auth2.rudderstack.com/saml2/idpresponse |
| ACS (Consumer) URL Validator | ^https:\/\/auth2\.rudderstack\.com\/saml2\/idpresponse\/\$ |
| ACS (Consumer) URL | https://auth2.rudderstack.com/saml2/idpresponse |
| Login URL | https://app.rudderstack.com/sso?domain=[your-domain.com] |
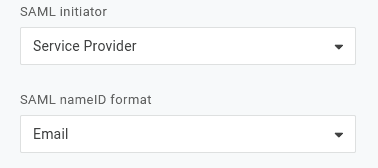
john@example.com, then your Login URL will be `https://app.rudderstack.com/sso?domain=example.com`.- From the dropdown, select the SAML initiator and SAML nameID format fields as shown:
- Next, go to the Parameters tab and add the custom parameters as shown below:
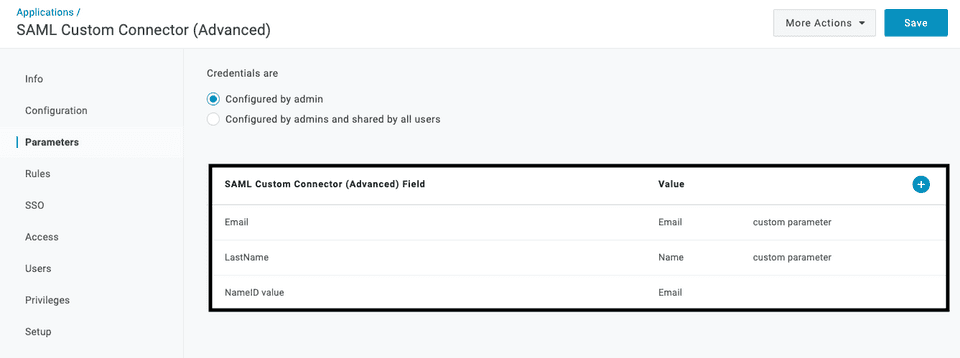
The custom parameters and their values are listed in the following table:
| Parameter | Value |
|---|---|
Email | |
| LastName | Name |
| NameID value | Email |
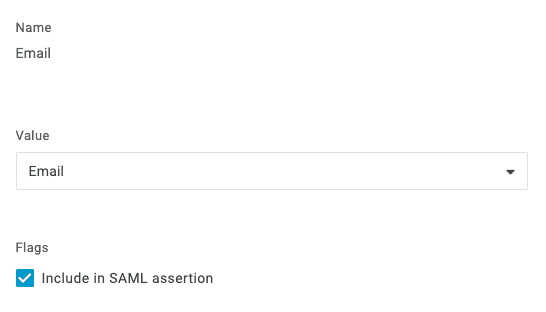
Name - which specifies how you would like to see your employees on the RudderStack web app.- To add any other custom parameter, click the + button, enter the Field name, and select the value from the dropdown, as shown:
- Click Save to save the configuration.
Enabling SSO
Go to the SSO tab of your app and copy the Issuer URL, as shown:
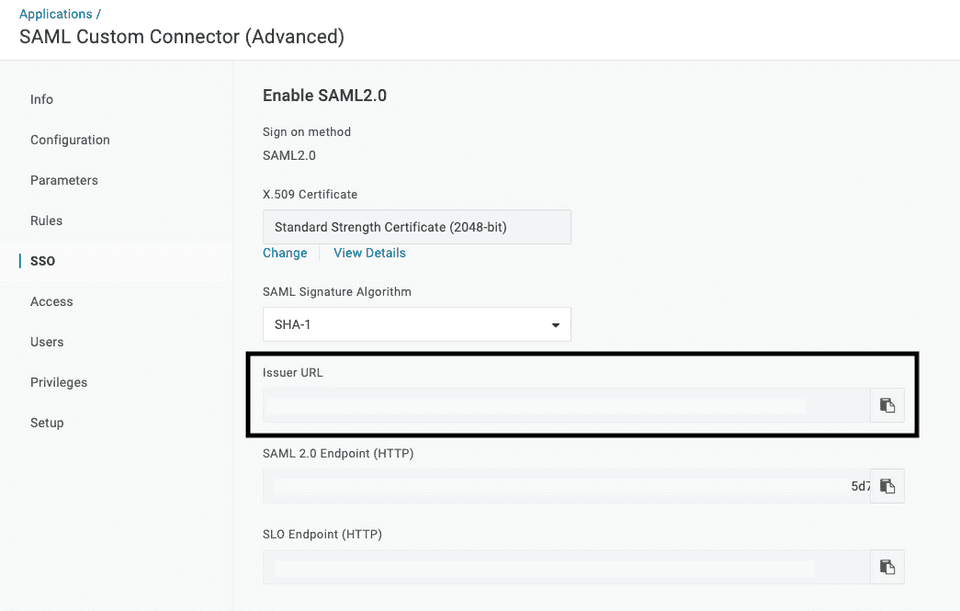
Share this Issuer URL with the RudderStack team.
Contact us
For more information on the topics covered on this page, email us or start a conversation in our Slack community.